Out & About with Jill

I am SUPER HONORED to be...
...as a guest designer for Virginia's View challenge!!
Here's a little peek at my projects.

Both were created with this month's challenge theme in mind.  Oh, how I love it!
I hope you will join in on the fun and play along.  Also, be sure to visit the post as I have a NEW PB&J video to accompany my creations AND a little birdie told me there is a great Penny Black giveaway, too!!

TWO Favorites; 3 of 3: Jill and Elizabeth

What's in the STUDIO this week? Two of our favorite things... Penny Black and Inchie Arts!

 We're both cooking up some artsy fun today.  AND in addition to Penny Black and Inchie Arts, we're also using beautiful new colors from Pan Pastel including Pearl Mediums (white fine, white coarse, black fine, black coarse), the Colorless Blender, and stunning Pearlescent (Violet, Orange, Red, Blue, and Green). 
For additional Pan Pastel information, be sure to visit their Website and Facebook page.

For my project I used 2 white ATC-sized Art Squares.  I applied Pan Pastels to the squares using Sofft sponges, creating a look of a sunset.  
Onto one of the Art Squares, I stamped branches (Penny Black 30-251 Nature's Gifts) using StazOn Ganauche ink.
 For the second ATC Art Square, I trimmed it into two pieces. On the larger of the two pieces, I stamped my sentiment (Penny Black 30-257 Joy Filled) using VersaFine Onyx Black ink. I adhered this piece below the panel with the branches and the smaller piece was adhered above the panel with the branches.
I embellished my card using Penny Black's Creative Die, 51-066 Crystal Trio.  Each snowflake was colored with Pan Pastels. I adhered the two larger snowflakes with dimensional adhesive and added a self-adhesive pearl to all three. A light coating of Krylon Matte Fixative Spray sealed all of the elements.  Once again, I love that I can use so many mediums with my Art Squares. 


For my project, I trimmed a 4" white Art Square into tag shapes. 


Using a large Sofft Art Sponge, the front of the tag was covered with Pan Pastel Colorless Blender and then Penny Black's Verdant stencil was secured on top using painter's tape.  Pearlescent Orange and Pearlescent Red Pan Pastels were applied to the flowers with a small Sofft Cover sponge.  I opted to hold the sponge rather than attach it to the applicator so I could have a little more control in the tiny areas.  The leaves were colored in Pearlescent Green and Permanent Green.  The soft background is Diarylide Yellow and Turquoise that were blended with a combination of Pearlescent Orange, Pearlescent Blue and White Fine Pearl Medium.

After the sentiment from Penny Black's Truly Great set (or Wishes in the second sample) was stamped in Onyx Black VersaFine, the piece was sprayed with Krylon Matte Acrylic Coating and then coated with Faber-Castell's gel medium.

Pearl gems, crystal rhinestones and May Arts ribbons accent the pieces. 


TWO Favorites; 2 of 3: Elizabeth

What's in the STUDIO this week? Two of our favorite things... Penny Black AND Inchie Arts!

Hello Friends! Today I am using Inchie Arts Art Squares to build a small box accented with handmade paper designed with Penny Black's stamps.
This marbled paper was created with Penny Black's Letter Background and Crystal Frame snowflake.

Here's a peek inside the box...
...which is filled with small watercolored Art Square tags/tiles. 

All these wonderful little gems are from the transparent set Tiny Treasures.

Be sure to check out the oodles of Penny Black/Inchie Arts inspiration being shared all this week on the Penny Black Blog!
(Psst:  They're also having a giveaway.)  

Like to read more about this project?  Click HERE.

You can also access complete instructions and supplies for the box HERE & the tags HERE.


TWO Favorites; 1 of 3: Jill

What's in the STUDIO this week? Two of our favorite things... Penny Black AND Inchie Arts!
Today I'm working on a white 4" Inchie Arts Art Square, adding stamping and colorful watercolor paints.

I began by stamping my brushstroke leaf branch, Penny Black 30-263 Lush and Lavish, using a light colored ink.  I then painted over the top of this image using watercolors.  Once dry, a Faber-Castell Design Memory Craft PITT Pastel Pencil was used to add a shadow around the leaves.
For complete instructions, my PB&J video tutorial can be viewed HERE.  And for lots more Penny Black and Inchie Arts inspiration (and a giveaway!) be sure to check out the Penny Black blog all this week.

EXCITING STUDIO NEWS!!

We are over-the-moon excited to announce that our artwork has been published in the new Cards To Canvas book written by Colleen Schaan and published by Annie’s, publisher of the popular CardMaker magazine.  Cards To Canvas is a book designed for crafters who want to LEARN some stamping and cardmaking techniques, DABBLE in some mixed media fun, and then APPLY those techniques and mediums to canvas wall art (or desk art)!  

We love this concept and truly couldn't be more honored to be involved.
The 80-page book includes a wide range of product information, step-by-step illustrated instructions for each technique, and 26 beautiful full-color projects (with instructions) that showcase a wide variety of products and techniques.  Some of the topics include: mark-making, stamping and doodling, collage, embossing and adding texture, adding color, faux finishes, and creating backgrounds.  

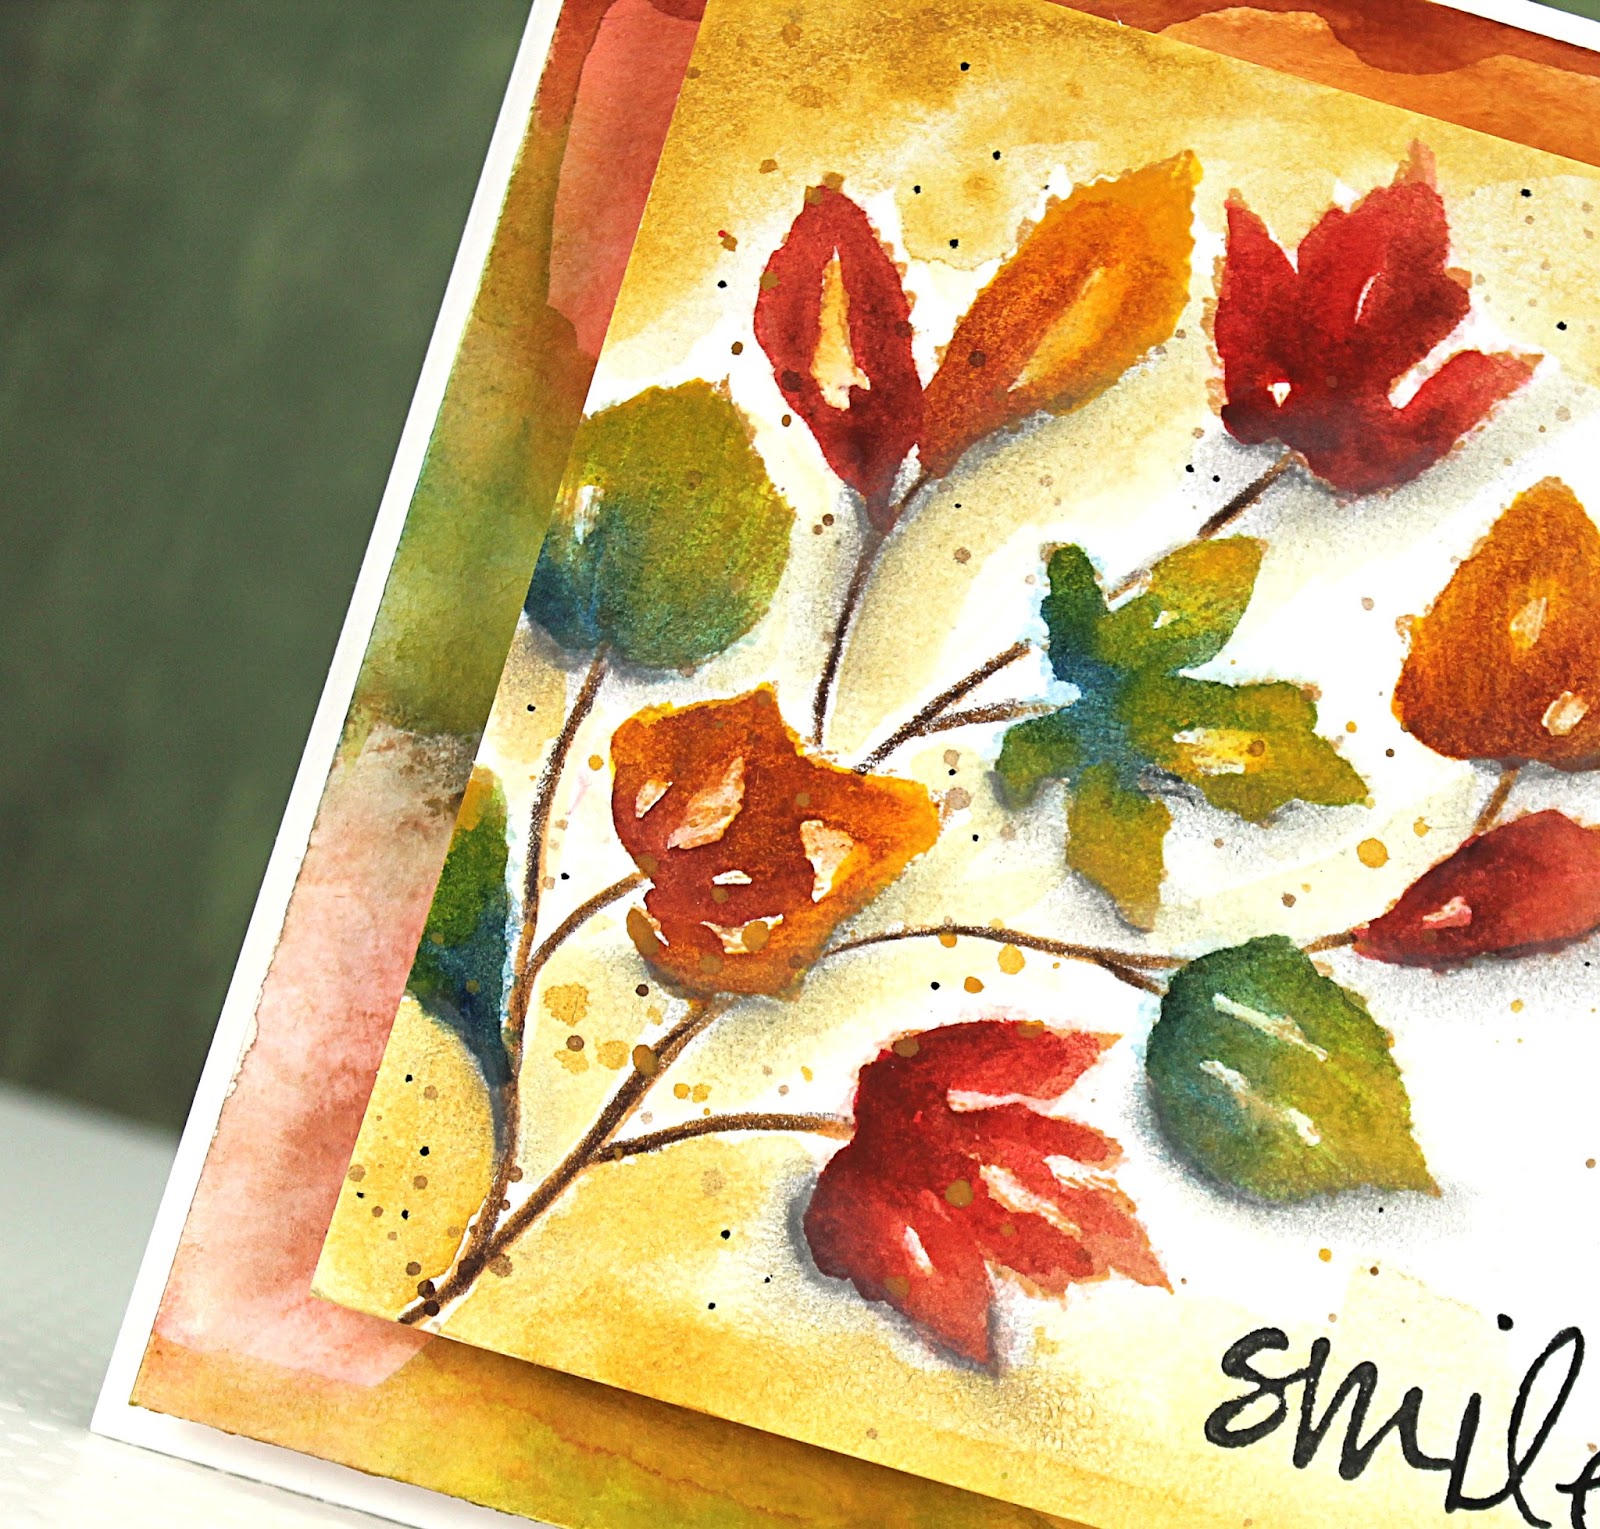
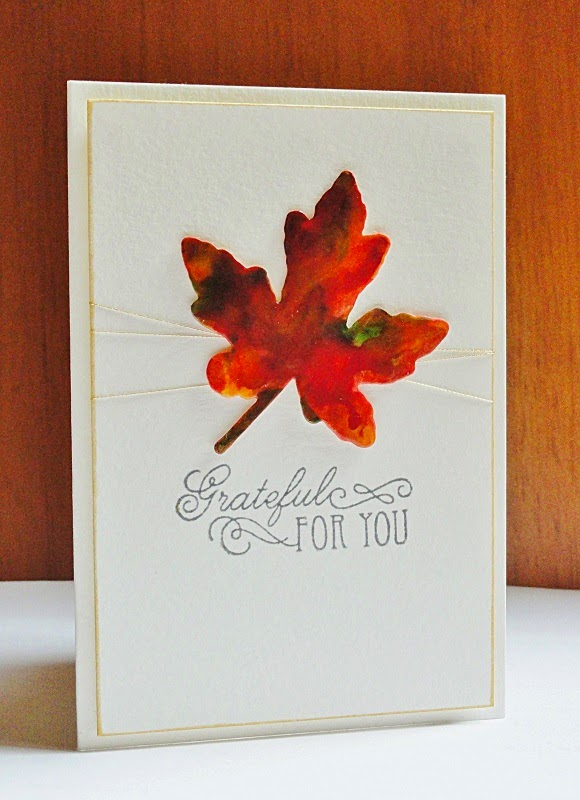
Here's a tiny peek at our projects.


The book is available in either print or digital formats and can be purchased from many of your favorite crafting stores or online bookstores.  Also available directly from Annie’s at: https://www.anniescatalog.com/detail.html?prod_id=114818&cat_id=1296

Thanks, sweet friends, for sharing in our happy STUDIO news!


Intricate Dies; 2 of 2: Jill

We've been crankin' away at the die cutting machine in the STUDIO and this week we're designing with intricate die cuts, selected from Penny Black's newest release, Winter Wonderland
I love, love, LOVE Penny Black's new Creative Die, 51-081 Branching Out. I think it will be great any time of year.  Today I've cut it from brown cardstock and paired it with a simple watercolor background painted with Sakura Koi watercolors.
I've also added stamping using Penny Black 30-261 Nature's Friends- love those birds, too!
For complete instructions, view the PB&J video tutorial HERE.
Wishing YOU a day filled with JOY! 

Intricate Dies; 1 of 2: Elizabeth

We've been crankin' away at the die cutting machine in the STUDIO and this week we're designing with intricate die cuts, selected from Penny Black's newest release, Winter Wonderland

The first thing that caught my eye about Penny Black's Creative Dies Stellar and Gossamer is that they have parts that are symmetrical!!
This meant that I could build dimension 
on BOTH sides of the die cut.


Several die cut layers and segments of the design 
were glued together on the front and back.

Each snowflake was painted with USArtQuest Duo Embellishing Adhesive and sprinkled with Angel Dust Art Glitter.

And the best thing?  They will not melt!

For a pdf containing the complete supplies and instructions for these ornaments, click HERE.


Autumn Splendor & Spooky Screams; 8 of 8: Elizabeth

Fall has arrived and with it a whole new season of designs.  Join us as we enjoy the ever-changing leaf colors with Autumn Splendor and the approach of some frightful fun with Spooky Screams.

To celebrate the splendor of autumn, I have two designs today.

This first card was inspired by all the vibrant leaves I saw this fall.

The card base is a piece of heavy-weight watercolor cardstock.  A smaller piece of the watercolor cardstock was cut to fit the front of the card, edged with Delicata Golden Glitz ink and wrapped with gold metallic thread.  After stamping the sentiment (Penny Black: Foliage Fancy)  in Gray Flannel Memento, it was attached to the card base with dimensional foam tape.

The die cut leaf (Penny Black Creative Die: Autumn Jewels) was layered with several applications of Dr. Ph. Martin's Hydrus watercolors and gel medium.  It's fascinating to see how multiple layers of these two mediums can add depth.

*********************************************

For this second design I did a little bit of "converting". 

This festive girl (Penny Black: Dreaming Of) exchanged 
her holiday apparel for fall fashion attire.  

To create patterned paper to coordinate with the ottoman, Dotlets (Penny Black) were stenciled on Blue Lagoon Mix & Match cardstock with Aquatic Splash VersaMagic ink.

The sentiment (Penny Black: Special Wishes) was stamped in Onyx Black VersaFine and elevated on to the card with dimensional foam tape.

TIP/HINT:  Use a die cut frame (Penny Black Creative Die: Hello Frame) to create decorative edging.  In this sample, the stamped cardstock was slipped under one edge of the die and then rolled into the die cutting machine until it reached the red line and then was reversed out.

Complete supplies and instructions for this project are available HERE.

Thanks for joining us at STUDIO SESSIONS for our 8-part series of Autumn Splendor and Spooky Screams.  

Stayed tuned for some "intricate" fun!